Follow my blog with Bloglovin
Showing posts with label tutorial. Show all posts

Sunday, 8 March 2015

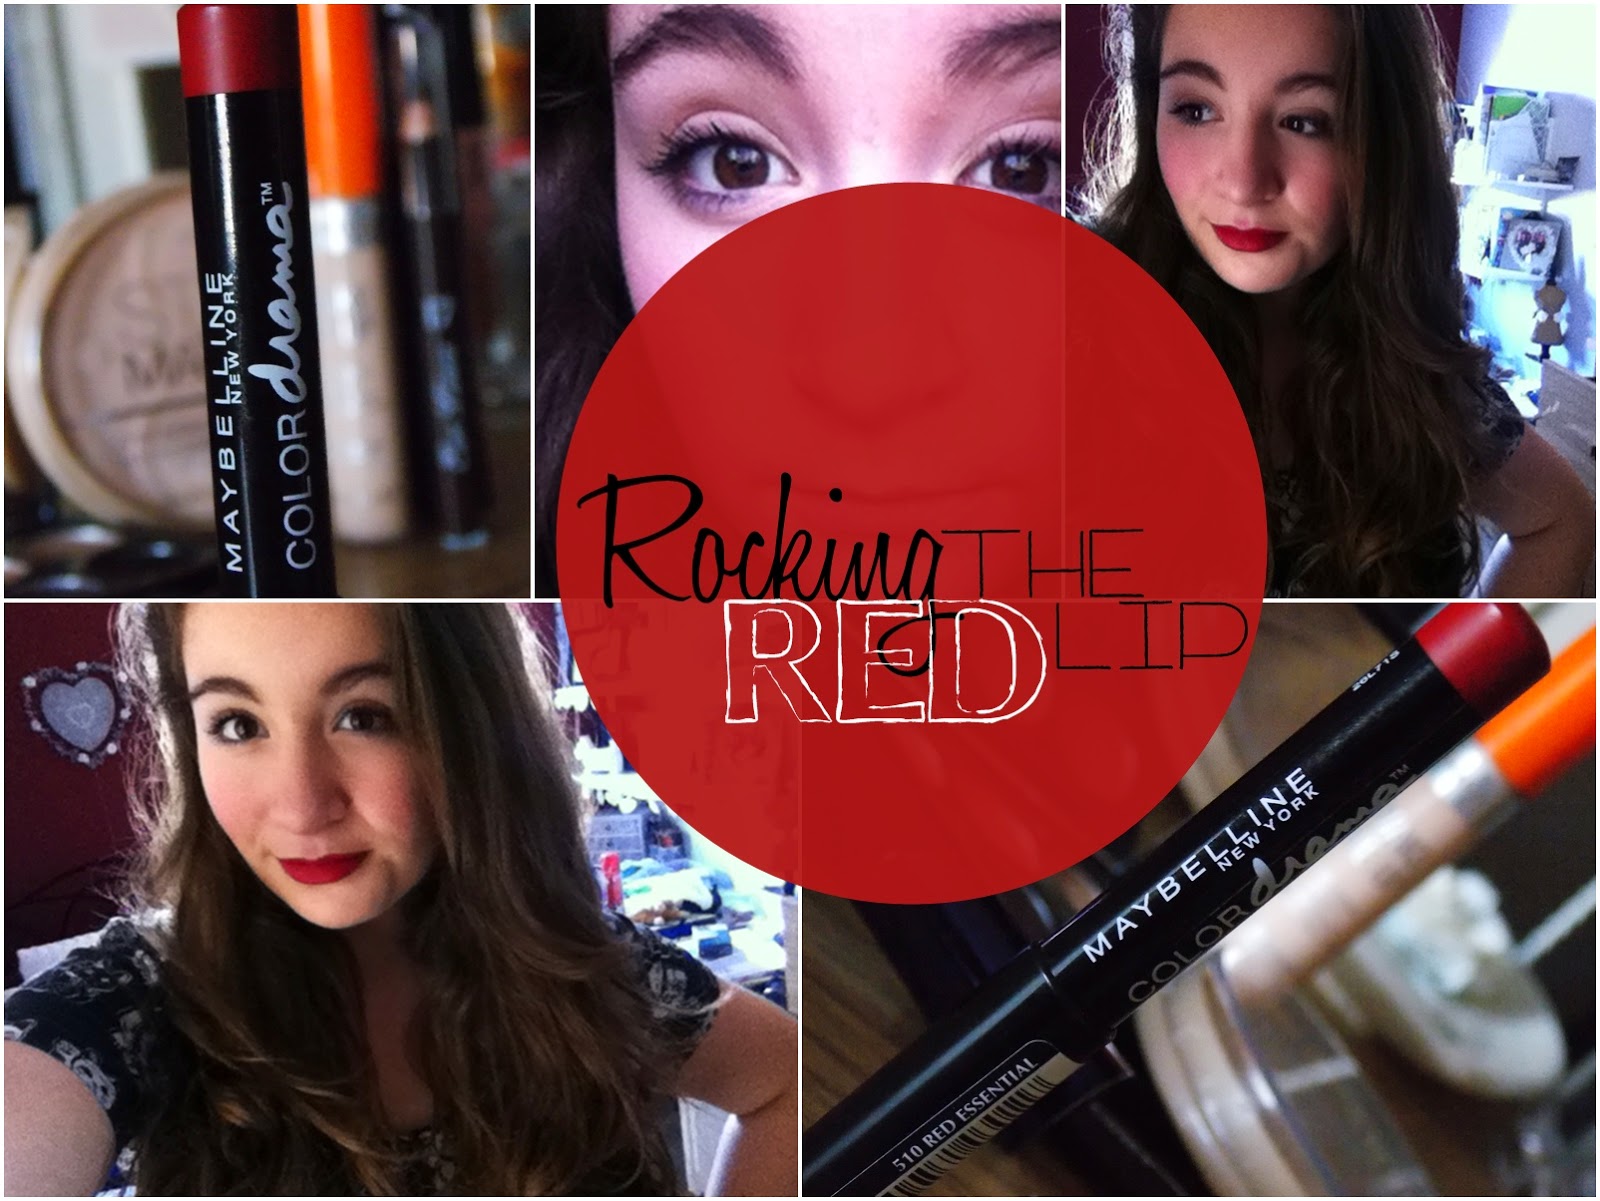
Rocking the Red Lip - Make Up Look


Hey,

Red lips. As classic a look as a little black dress, yet the tradition never wears old. Bold lips are a much-loved makeup statement that demands to be recognised, and even though I’m totally in awe of the look, it’s taken me a while to actually try it out. This is just a simple makeup tutorial of how I’ve been enjoying wearing red lips recently, I hope you enjoy it.

Wednesday, 4 February 2015

The 'Big Eyes' Makeup Trio | Product Review and Tutorial

Hey,
So today I wanted to share with you my current makeup love. My basic everyday makeup routine really doesn’t change much but recently I’ve been trying something new. I love winged liner but recently I’ve found myself becoming bored of the style and instead opting for this big eyes look.
To create this ‘big eyes’ makeup, I’ve been using three amazing products.


First I use my Supercat eyeliner from Soap&Glory. I don’t think I can rave about this product enough, but all I can say is that if you like a bit of eyeliner then it’s one to try. Personally the easiest technique for me is to apply eyeliner with a thin felt tip pen, and this eyeliner is the best I’ve tried. It’s got a fine tip, so is easy to create the shape and thickness of your liner, and is also precise. I use it to create a simple line. If it is a school day then I’ll draw it close to the lash line and very thing, if it is a weekend then I like a thicker line. I keep the line rounded and do NOT do a flick.

The next item I use it my MUA eyeliner in the shade Snow White, the key product to this look. Adding a white/ light eyeliner to the waterline opens your eyes up, making you look awake and big-eyed. The best bit about this product is I picked it up in Superdrug for an amazing £1! The quality is just what I need to do the job; the pencil is soft and it comes with a sharpener in the lid. I don’t go over the top at this stage, or you end up looking a bit ghostly, but lightly line my eyes and then blink a few times. I am also keen to try out a nude eyeliner but can't find a cheap one anywhere- so if anyone knows where I can get one please let me know!!

The last item I use in the trio of products is the new mascara I’ve been testing out and adoring! I have so many great mascaras but I always find they are too heavy/ thick for everyday use, they don’t stay long enough or they just don’t give my lashes enough to make them stand out. However when I tried this one, I knew it was going to be one to stay! The No7 Extreme LengthMascara is one that I picked up because I’d already tried a mini version and it was drying out.

No7 is a brand which I think is a little under-estimated. I know that I often consider it to be more for older women, I know my mum loves the range, so I often look past the counter. No7 is a Boots only brand and can be a little pricy at times, but the choice and quality of the products really are impressive. This is the first mascara in full size that I’ve tried from the brand and I know if I ever fall out of love with it then I’ll still come back to find a new one. With all their mascaras averaging at about £10 they aren’t the cheapest on offer but there if a good choice of different types targeting length, volume and thickness. The Extreme Length mascara works so well at making my lashes bold and thick, as well as long and volumised. My lashes hold a curl and it stays all day, so I rarely need to top up. It could be a day or night mascara and is easy to remove in the evening. I think we’ll be seeing this product a lot in the next few months on mydaisychaincloset!

I use the mascara on my top and bottom lashes, applying just one coat- but making sure all my lashes are well-covered.
And that’s all! Together this trio of products make my eyes appear bigger and I love the effect of it! I normally apply quite basic makeup around the eyes (normally some concealer, powder and lip balm on a day-to-day basis) so these products really make the look!


I hope you enjoyed this more talkative makeup tutorial/ review. If you have any eye makeup tips then I’d love to know- I’m also keen to try out new techniques and products! I hope you’ve all had a lovely day so far, 

Social networking-

Tuesday, 16 December 2014

Christmas Party ~ Make Up Look| Blogmas Day 16


Hey,
So today I wanted to show you a makeup look I have been loving. Perfect for Christmas parties, this simple eye and lip combo will make sure you are ready for the party season. I based this look around a bold lip, using bronze/ gold tones on the eyes and a dark raspberry shade on the lips.


1.       To begin, complete your normal everyday base makeup. Today I just used concealer and powder, but you could contour and use foundation if you wanted.


2.       Next I begin on the eyes. I used the Sleek Au Natural palette to create this exact eye makeup, but you could use similar browns. I used the shade ‘Honeycomb’ all over the lid, which is a yellow toned brown.

3.       Next I take my colour infallible eyeshadow, in the shade ‘Hourglass Beige’. This is a lovely golden eyeshadow, and remember a little goes a long way with glitter shadows. I tap this all over my lid, on top of ‘honeycomb’.

4.       Now I take the shade ‘Conker’ which is a shimmery brown and I apply this to my crease. I blend the three eyeshadows together to create a smoky eye look.  

5.       Take an eyeliner of your choice and create a small cat eye look. I kept the flick quite subtle because, for me, this look is all about the lip colour. I also apply a bold mascara, and I choose to use my Benefit They’re Real mascara. This one is amazing for parties because it lasts a long time and makes my lashes look almost false.


6.       Now I move onto lips. I choose to moisturise my lips with my Nivea lip butter in the flavour macadamia and vanilla. Then I choose not to line my lips but go straight in with the lipstick. I love this lipstick shade because it is so wintery but is different to the more common bright red or dark red lips. This warm raspberry is shade 30 from the Kate Moss lipstick range and I adore it!


And that is the Christmas look I have created this year. I hope you liked it and will may be try it out for one of your Christmas parties! I really enjoy making these types of posts, and I hope you enjoy reading them as well! I hope you have an amazing day- only 9 days till Christmas! 

Social networking-

Wednesday, 29 October 2014

Cat || HALLOWEEN TUTORIAL SERIES


Hey,
So this is the last of my ‘Halloween Tutorial Series’ and it is one of my favourite Halloween looks- the cat. I was inspired by my look last year, and decided I’d recreate this bold, but pretty cat makeup.

Last year, I wore this look with scruffy back-combed hair, metal cat ears and all black clothes (top, skirt, tights and shoes). I think this look is really effective, you could even add false lashes to make it even more dramatic!

So I began with my simple face makeup done, for me this was just concealer, but you could use foundation and contouring.


1.       To start the cat look you need to use some eyeshadow. I choose to go with a glittery eye so that the dark eyeliner really stands out. I used this beautiful eyeshadow, which is a L’Oreal ‘Colour Infailliable’ in the shade ‘Hourglass’. I put this all over my eyelid and below under my eyes. On top of this I put a dark brown in the crease of my eyelid and blend. To top this of I use a glitter rollable to distribute glitter all over the eye.


2.       Next is the cat eyeliner. To begin, I take my Supercat liner and line my eye from the inner corner of my eye to the end of my eyelid. Then I roughly create a flick line and make it thick and bold. I also make the line, which is close to my lashes, thick. Then I take the eyeliner and draw a line under my eye, keeping close to the lashes. To make the look more cat-like, you want to bring the liner at the inner corner and create a small flick down. Add lots of mascara, for extra drama, make sure you layer it!


3.       I now do the nose. I take any liquid eyeliner and follow the shape of my nose so that it looks more like an animal nose. Be careful not to get it up your nose! Then you must follow the nose to the lips with a thin straight line.
  For the whiskers you can do any amount of whiskers, of any thickness and length. Match these on the other cheek.


4.  To finish the look I moisturise my lips and then I choose a dark lip. I choose this berry/pink shape and roughly added it to my lips. You could change this to a very dark black/purple or keep it lighter, like a pale nude.


So that’s it and this is the last of mu tutorials! I have really enjoyed making these looks, I hope you have enjoyed watching them too! Let me know what you’re being for Halloween too! I hope you all have a haunting-ly good Halloween,


Wednesday, 8 October 2014

Autumn Leaves ~ Make Up Look


Hey,
So autumn is here and this calls for change; clothes become darker, lips become bolder and nails turn to warmer shades. I recently purchased some Real Techniques make up brushes with some birthday vouchers, and when I got them I was so excited that I decided to create this make up look. Full of warm browns and berry reds, this look is perfect for the season change.

Products:
Wake Me Up -Foundations
Stay Matt -Powder
Au Naturel -Eyeshadow palette, Moss Bark
Supercat -Eyeliner 
They're Real -Mascara
Vanilla lip balm by Body Shop (seasonal range)
Plum Beautiful -Lipstick
Eye Brushes -Real Techniques
Face Brushes -Real Techniques


To achieve this look complete your normal skin routine- i.e concealer/ foundation etc. I used the Wake Me Up concealer on problem areas, foundation on top- blended in with the buffing brush and then Collection concealer over the top on the really bad areas, like under the eyes. 
Then to create the brown eye look, I used the shade Moss, from my Sleek palette, all over my eyelid and then the shade Bark in the crease. I used the Real Techniques brushes to apply and blend the shadows. Then I took my pen eyeliner and drew a thin line close to the lash line. I took the line right into the corner of my eye and to the edge of my eyelid with no flick. I think this technique really opens your eye. Then I used my favourite mascara to coat my lashes, making them look thick and bold.
For lips I used a moisturiser and then put a pink to berry coloured lipstick on top. I like the lipstick I choose because it's not too dark but still gives the look an autumn vibe.


I hope you liked this look, I’m still working on how I show you make up looks. I hope you enjoyed the photography on this post as well, I got really autumnal when I brought the brown leaves inside! I hope you all are ready for autumn 2014,

Friday, 25 July 2014

Summer Nights make up look | #summerstyle


This is exciting, a post on a Friday! So I have found myself with a bit of extra time in the holidays, and I have been feeling really creative and want to do more posts on my blog. I write this blog as a hobby, and over the summer I am going to try putting up three posts a week, Sundays and Wednesdays as normal- but also Fridays! I hope my few readers will enjoy this, if you do read my posts I’d love to hear your opinions or improvements.
So today I am doing another make up tutorial, however this time it will be a more dressed up look- perfect for summer nights. This look is still quite simple, and defiantly achievable for anyone. I will list the products I am using, but you can always switch them up for your own alternatives.


So to start the look I begin with concealer. I am currently using the stick concealer from Rimmel London, called the ‘Hide the Blemish Concealer’. I think this product is ok but I find it quite drying. It’s cheap, which is why I bought it, but I’m not sure I personally would repurchase it. It worked well in this look though.

Begin by putting the concealer in any areas you want to cover, for example dark circles, red-ness and spots. I look really quite scary in this photo, but I know for beginners this may be helpful. I like to blend my concealer in with a cheeks brush.  


Over the concealer I put foundation. In the summer I normally stay away from foundation, even BB cream, because I like a lot less coverage. However for nights out, I do sometimes like its effect on my skin. The
foundation I am using in this look it the ‘Collection Lasting Perfection Ultimate Wear Foundation’. I have been using this one for a while and I must say for a cheap-ish product it works very well. I also like how it has undertones of pink instead of yellow, as this appears more natural.
I dot this on my chin, forehead and cheeks, blending it in again with a cheeks brush.


To set my skin I use powder. I like to use powder because it eliminates shine and matte-afies your face. I use the Rimmel London ‘Stay Matte’ powder. This product is amazing and is probably my most re-purchased item. I you a fluffy brush and put the powder all over, especially in the T zone.


Next I do my eyes. I am using eye shadow in this look, but decided to keep the colours quite natural and wear a bold lip. Then I put all over my eyelid is a new favourite of mine. This shade from Seventeen makeup and is called ‘funfair’. I like this because it appears natural on the eyelids, but steers away from using too many warm brown tones. I like this because I normally wear those colours in the autumn and winter, so the choice is something different. I use a large eye shadow brush- although you can use your finger if you want. The colour is a pink with a tiny bit of shimmer, although it does not make your eyes glittery.
In the inner corner of your eye (here is a photo to help you), to brighten your eyes use a light shade. I decided to use my ‘Colour Infallible’ pressed eye shadow from L’Oreal. Mine is in the shade ‘Hourglass
Beige O2’ and is sadly broken, however I still use it. The colour is very light and shimmery and I think it has rose gold undertones. I like this because it adds a little touch of glimmer to the yes, without looking childish or tacky. I use a small pointed brush to apply it and then blend it slightly.
To contour the eyes, you will need a dark shade. I chose a brown shade because I wanted it to look quite dramatic. I used a No7 eye shadow in the shade ‘Truffle’, and bought it in around my crease and under my bottom lash line. I do find this quite difficult as it takes quite a while to blend the crease with the lid colour, nonetheless it is definitely worth it.


Next I light to add some eyeliner to my waterline, this is optional and takes practise if you are a beginner. I like to do this as I think it makes my eyes look bigger and bolder. The pencil I use is from Rimmel London and is their ‘Soft Kohl’ eyeliner pencil in black.


For eyeliner on my eyelid, I am trying a new eyeliner to replace my Primark pen eyeliner. The only reason I am doing this is because I have found myself getting bored of it and I do find it doesn’t stay very well. I would defiantly recommend the Primark one for beginners though, as it is cheap and easy to apply. I am using the Soap & Glory ‘SuperCat’ liner in ‘carbon black’. I take the pen nib and line from just away from my inner corner, taking it out (whilst following the lash line) getting slightly thicker towards the end. For this look I do a small cat-eye flick, this takes a lot of practise but you basically just flick the eyeliner and join it up.


Because this look is for I night out I use my ‘They’re Real’ mascara from Benefit. This is the best mascara I have ever used, but it is so expensive. I only buy drugstore make up and Benefit is the higher end of drugstore. I was actually given this travel-size from my Nan, and I keep it for special nights out so I don’t use it up. I would really like the full size, but I can’t justify spending that much on a mascara at the moment. A cheaper drugstore alternative is the Maybelline ‘the Falsies, Volume Express’ mascara.


So that is my eyes done, now I move onto lips. I moisturise my lips I use Vaseline in ‘original’. This is really great for hydrating my lips before applying colour.


For lips I decided to choose a bold lip, something I don’t always go with but the shade feels so summery to me. This bright orange lipstick doesn’t actually come out so florescent on the lips, more of a salmon/coral colour. This lipstick is from Rimmel London and is in the shade ‘Coral Queen’.


The products:
Concealer- http://www.boots.com/en/Rimmel-Hide-The-Blemish-Concealer_6976/ 
Foundation- http://www.boots.com/en/Collection-Lasting-Perfection-Ultimate-Wear-Foundation-SPF-20_1436025/ 
Powder- http://www.boots.com/en/Rimmel-Stay-Matte-Pressed-Powder_1015573/
Funfair- http://www.boots.com/en/SEVENTEEN-Solo-Eye-Shadow_927050/
Hourglass Beige- DISCONTINUED 
Truffle- http://www.boots.com/en/No7-Stay-Perfect-Eyeshadow_1273244/ 
Eyeliner pencil- http://www.boots.com/en/Rimmel-Soft-Khol-Kajal-Eye-Pencil_6950/
Eyeliner pen- http://www.boots.com/en/Soap-Glory%C2%99-Supercat%C2%99-Eyeliner-Pen-Carbon-Black-Extreme_1450229/
Mascara- http://www.boots.com/en/benefit-theyre-real-mascara_1231677/
Alternative mascara- http://www.boots.com/en/Maybelline-Falsies-Mascara-Waterproof-Black_1416719/
Vaseline- http://www.boots.com/en/Vaseline-Lip-Therapy-Petroleum-Jelly-Original-20g_1421/
Lipstick- DISCONTINUED in boots but avalible: http://www.chemistdirect.co.uk/rimmel-moisture-renew-lipstick-coral-queen-620/prd-2g4k

So that’s it! I hope you like this look, and found my instructions as helpful as possible. If you would like any other makeup looks or tutorials, or even tips, just let me know in the comments. Have an amazing weekend,


Wednesday, 12 February 2014

Valentines make up


So it’s valentines day in just 2 days now! So it’s time for the post about valentines make up, if you haven’t already, why not read my post about outfit ideas as well? (http://mydaisychaincloset.blogspot.co.uk/2014/02/valentines-outfit-ideas.html )

I don’t really know a lot about make up, im a learner but do enjoy trying different looks. These are two perfect for valentines, I hope you will like them and I do apologies


for some of the photos of the make up as the quality is bad.

Please remember, I have split both outfit and make up idea into two sections. One is girly cute heart filled valentines day (very pink) and the other is more romantic/ date/ party themed. These are not DIY’s but are a list of the products and a bit about where I used them.


For both looks I am using these products on my face,
  • Foundation, smooth effects foundation in creamy ivory (Max Factor)
  • Powder, stay matt pressed powder (Rimmel London)
  • Mascara, Black mascara (Barry M)
  • Blush, Blush in plum puff (Seventeen)


I also used a eyelash curler to curl my lashes on both looks. You can get these in sets, like i did, or buy seperatly.


Look one is ‘pretty in pink’,


This look is less of the all year look and more just for valentines! I have created this look of pink and glimmer eyes, large lashes and a lipstick heart on the cheek. The look is playful and cute, whilst being still pretty, although the lipstick heart may not appeal to all of you- I know I might not be the first to wear it in public, but it could be perfect for a valentine’s party!

The products I used and where I used them:
  • Covering the lid of the eyelid- I used a pink tone from an old (no.7) eye shadow palette but any basic matt pink would be good.
  • In the crease of my eyelid- I used a pink shimmer eye shadow. You don’t need a lot of the product I used, which was a dazzle dust in neon pink (Barry M), to give this look. Just add a little to the crease and blend with the main lid.
  • Over the eye shadow- to add a touch of sparkle, I used a sparkle roller ball (Body shop), which  really adds some girly glimmer.
  • For my lips- I used a (body shop) lip butter in coconut, as a moisturiser and then for colour I used my Kate Moss lipstick (Rimmel London) in 008
  • Then on my cheek- I used an old berry tone lipstick (no.7)


The next look is called ‘red carpet glam’,


This make up look in made up of a glittery bronzy eye shading mix, with a bit of a smoky eye style, cat flicked eye liner and a bold romantic red lip. I have worn this look before for events and occasions, but also think it would be great for a date night look.

The products I used and where I used them:
  • On the eyelids- I used, over the main part of the eye lid, a colour inflammable eye shadow (in hourglass beige although this is old stock from L’oreal Paris)  I used the lightest tone in the corner of my eyes from my (no.7) in good earth, which is a natural tone palette. Then in the crease of my eye I used a dazzle dust (Barry M) in chocolate, this is a bronzy brown shade
  • For the eyeliner- to create the cat eye flick I used the eyeliner from the natural collection, although I don’t really like this one, it doesn’t last well and is too thin.
  • Lips- On my lips I used the (body shop) lip butter in coconut, as a moisturiser and then over a splash of colour with my lip crayon in red (I don’t know from where). You could also use a clear gloss for extra shine


So I hope you enjoyed these two looks and have a great valentines. Please give my some comments and advice on my blog posts, I want to get better for you. Have a lovely weekend,


Sunday, 2 February 2014

How I style... Buns

Hey guys,

So it’s February!!! I have been waiting to post this for absolutely ages because I’ve been so excited for the new look and revamp of mydaisychaincloset! I hope you like the new look I’ve created; I think it feels a lot more organised and sorted now.

Today I’m doing a post all about how I style buns. I am one of those people that loves to wear their hair down and I am often reluctant to put it up in a ponytail or bun. But, in the months of December and January, I have found some new ways of wearing buns and I am really like them now. This post will show you a few examples of my ways to wear them and how I create the look, although I decided not to do a picture DIY on all of them because it would take ages!!!


The first one is a big floral bun.
To create this look you will need: a hair brush, two plain black/brown hair bands, bobby pins/ grips, hairspray, a hair doughnut and a floral hair band.
  1. To begin brush through your hair, I use a paddle brush because of my thick hair, and tease the hair that is on the top of your head (this will make it look a little more natural and messy). Then throw your hair into a high ponytail, you will need to use one of your hair bands to secure this.
  2. The next step is to put the doughnut onto the ponytail, if you’re interested the one I used was a brown middle to large one from Primark, it cost £1.50 and I think it is perfect for my hair. Now carefully tip your head and spread the hair till there is hair 360 degrees/ all the way round. Put the next hair band over the doughnut and hair. I usually can’t double band it, so don’t worry if the band is a little loose. You can also pull at the hair a little to make it look more natural.
  3. Then you can put on the floral hair band. My one is from New Look and is called ‘rose top not’, it cost me £3.99. Again you can only place this on and not double band it, but its ok because you can secure it next.
  4. Now you will have a lot of ends that didn’t fit into the bun. Take out your bobby pins, mine are from a mixture of places (although the £0.99 ones from New Look are my favourite). Depending on the amount of hair you have this might take a few Bobby pins or lots and lots. Rotate the ends round clockwise, putting in a bobby pin every few points. Continue this until your ends are all secured at the bottom of your bun- I normally need 5-8, depending on my hair that day. Also make sure your hair bands and floral band is secure.
  5. To finish you can add as many bobby pins as you like to make the top of your head hair secure and look good. I also like to pull out two bits of hair in front of my ears to frame my face. Mine are normally naturally but I do sometimes have to non-heat curl them. This is easy to do my wrapping the hair around the end of a hairbrush and hairspray it lightly.
I normally then add a light layer of hairspray so the look holds.
I really like the way this big floral bun looks and think it is perfect for spring.


My next bun is a scruffy messy bun.
This bun is quite simple but takes a little practise to get completely accurate! This bun can be worn casual but is also easy to dress up.
To re-create this bun, you will need hairspray, two hair bands, a hairbrush and lots of bobby pins.
  1. To start, brush through your hair so there are no tangles. Then tease the top part of you hair so the bun will look natural.
  2. Next put up your hair into a high pony tail and make sure it is secured.
  3. After this is the step to making it into a bun. I never do this step quite the same, it is quite complicated. Grab your hair in any random way and hold it. Put a hair band around this.
  4. Your hair will look really messy and un-bun-like, but it’s ok!
  5. Now take the ends and rotate them round the bun clockwise, remembering to put pins in every few points in the bun.
  6. To finish this, you can pull out a few bits of hair on each side of your face; this will frame your face.
Now you are done! I love this bun but I normally need to hairspray it so it stays throughout the day.


This bun is called the big lazy bun.
I wear this bun casually normally, and I love it for how quick, simple and comfy it is to wear.
To make this bun, all you will need is a hairbrush and one hair band, bobby pins are optional.

  1. Start by brushing through your hair and teasing the top. This will really make the bun look better, as it will appear natural and not so scraped back.
  2. Now hold your ponytail, it can be high or medium.
  3. Begin to tie the hair band around the ponytail, but stop on the last/ tightest round. Carefully, catch the hair in the hand and then leave it before you would’ve pulled it throw.
  4. You can now, if you want, bobby pin the ends that stick out and pull bits of hair to frame your face.
This looks simple and so cute too.


This final bun is called the doughnut plait.
For this you will need to know how to do a basic plait, a small elastic/ hair band, two normal sized hair bands, a medium to large sized doughnut and bobby pins. Hairspray is also optional.
  1. To start brush through and tease the top part of your hair.
  2. Tie your hair up into a high-ish ponytail and secure it with one your normal hair bands.
  3. Now place the doughnut over the ponytail. Then, gently pull out a longish piece of hair, away from the doughnut. This piece must be reasonable thick and long-ish.
  4. Spread out the rest of your hair, covering the doughnut and secure it with a hair band. Pull out the hair slightly on the doughnut.
  5. Take the hair you left over (not in the bun) and plait it as far down as possible. At the

    end, tie a hair band/elastic.
  6. Now pin (with bobby pins) the bits/ ends of hair that were left from the doughnut. Do not include the plait yet.
  7. Now you can tease the plait slightly, so it appears chunkier, and go around the bun, over the ends. You can go around as many times as is possible and then bobby pin the plait’s end into place and the final look will give you a unique and textured bun.
  8. Again you can also hairspray the bun and pull out bits of hair from around your face.
I sometimes wear this bun if I’m trying something adventurous or am looking for something different.

So I hope you’ve enjoyed my DIY buns, and also if I have inspired you to try out some different bun styles. I really do hope you have enjoyed this post, my schedule promises lots of exciting posts coming up as well. Please leave a comment down below, this will really help me improve in all ways! I hope you have a lovely day,